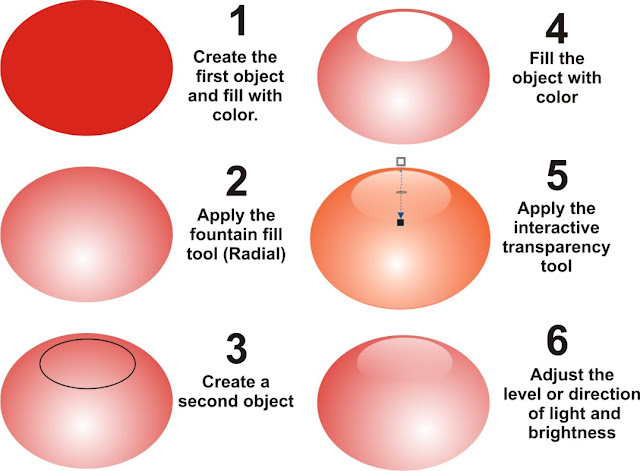
Attractive glossy buttons can be done with design softwares like Adobe Photoshop and Coreldraw. For this post, I would like to illustrate how I was able to design a glossy button using Coreldraw X3.
1. Create an object (using Ellipse tool for this example)
2. Fill the object with color.
3. Click the FILL tool and apply FOUNTAIN fill (Figure 1). Choose the RADIAL fill.
4. Adjust the level of brightness by adjusting the lever (move the midpoint).
5. Create the second object using the ELLIPSE tool.
6. Put this object on top of the first.
7. Fill with the desired color preferably the color with lighter shade.
8. Click the second object and click INTERACTIVE BLEND tool (Figure 2)
9. Choose the INTERACTIVE TRANSPARENCY.
10. Apply the transparency by dragging the mouse from top to bottom.
11. Determine the level of the desired brightness by adjusting the lever at the middle.


No comments:
Post a Comment